How to Take a Screenshot in Windows 10 and Above | All Methods
Taking screenshots in Windows has become an essential skill for everyone, whether you’re capturing important information, saving memorable moments, or documenting technical issues. Knowing the different ways to take a screenshot in Windows can significantly improve your productivity and make your daily computer tasks much easier. Windows 10 and later versions offer multiple built-in methods to capture your screen, each designed for different scenarios and user preferences.
Many users struggle with finding the most efficient way to Take a Screenshot in Windows for their specific needs. While some situations require capturing the entire screen, others demand more precision, such as selecting a particular window or a custom area. Additionally, knowing where your screenshots are saved and how to access them quickly can save valuable time. The good news is that Windows provides several powerful screenshot tools that cater to various requirements, from simple keyboard shortcuts to advanced snipping utilities.
This guide explains the top ways to screenshot in Windows 10 and above, providing you with practical, step-by-step instructions for each method. Moreover, you’ll discover which technique works best for different situations, helping you become more efficient in your screenshot-taking skills. By mastering these methods, you’ll be able to capture anything on your screen with confidence and ease.
7 Ways to Take a Screenshot in Windows 10 and Above
Windows operating systems have evolved significantly over the years, and consequently, the screenshot capabilities have become more sophisticated. Before diving into the specific methods, it’s important to understand that Windows offers both traditional and modern approaches to capturing your screen. The traditional Print Screen key has been a staple for decades, while newer tools like the Snipping Tool and Snip & Sketch provide enhanced functionality with editing features.
Furthermore, Windows 10 introduced the Xbox Game Bar, which was initially designed for gamers but has proven useful for general screenshot purposes as well. Each method has its unique advantages, and understanding these differences will help you choose the most appropriate tool for your needs. Some methods automatically save screenshots to your hard drive, whereas others copy them to the clipboard, requiring you to paste them into an application manually.
You may find this interesting: Learn How to Study Abroad under Scholarships
Method 1: Using the Print Screen Key
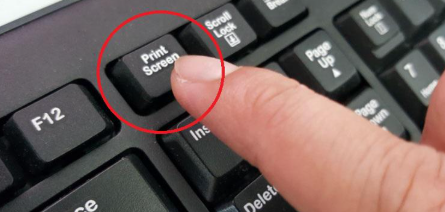
The Print Screen (PrtScn) key represents the most straightforward way to screenshot in Windows, and it has been available since the earliest versions of the operating system. This method captures your entire screen and copies it to the clipboard, allowing you to paste it into any application that supports images.
To use this method,
Step 1: simply press the PrtScn key on your keyboard.
You won’t see any visual confirmation that a screenshot has been taken, but the image is now stored in your clipboard. Subsequently,
Step 2: Open any image editing software like Paint, Microsoft Word, or even an email client, and press Ctrl + V to paste the screenshot. You can then save, edit, or share the image as needed.
This basic method works exceptionally well when you need to capture the entire screen quickly. However, it requires an additional step of pasting the image into another application, which some users might find inconvenient. Nevertheless, it remains one of the most reliable methods across all Windows versions.
Method 2: Using the Windows Key + Print Screen for Automatic Saving
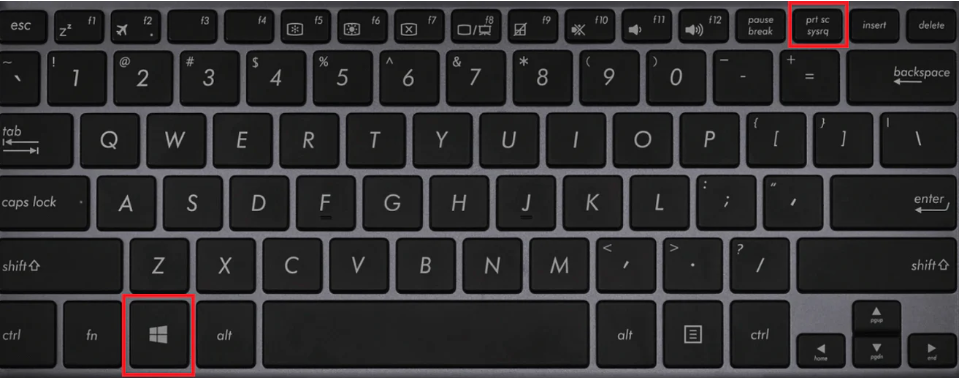
While the basic Print Screen method requires you to paste the screenshot manually, combining the Windows key with Print Screen offers a more convenient solution. This keyboard shortcut captures your entire screen and automatically saves it as a PNG file in a designated folder.
Press Windows key + PrtScn simultaneously, and you’ll notice your screen briefly goes dim, indicating that a screenshot has been captured successfully. The image is automatically saved in the Pictures > Screenshots folder on your computer. This method is particularly useful when you need to take multiple screenshots quickly without interrupting your workflow.
Additionally, this approach eliminates the need to open another application to save your screenshot. The files are named sequentially (Screenshot 1, Screenshot 2, etc.), making it easy to organise and locate them later. For users who frequently take screenshots, this method significantly streamlines the process
Method 3: Using the Alt + Print Screen for Active Window Capture
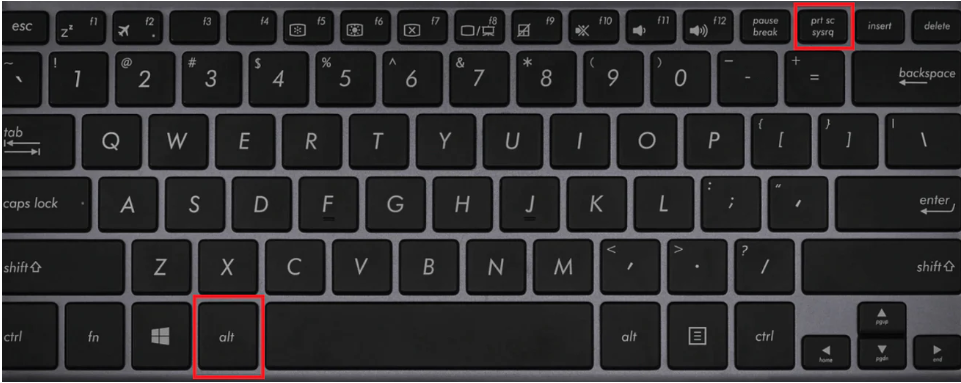
Sometimes you don’t need to capture the entire screen, but rather just the window you’re currently working in. The Alt + PrtScn keyboard shortcut provides an opportunity to screenshot only the active window.
Step 1: Make sure the window you want to capture is active (in focus)
Step 2: Press Alt + PrtScn together, and Windows will capture only the foreground window, excluding the taskbar, desktop, and other open applications.
The screenshot is copied to your clipboard, and you’ll need to paste it into an application like Paint or Word to save it. This method is incredibly useful when you’re documenting specific applications or creating tutorials that focus on particular software as it is similer to the method one above but requires that you simultaneously press the Alt + PrtScn together.
Moreover, this technique helps reduce clutter in your screenshots by excluding unnecessary information. It’s particularly valuable for professional documentation, where clarity and focus on the relevant window are essential. The captured image will have a cleaner appearance compared to full-screen screenshots.
Method 4: Windows Key + Shift + S (Snipping Tool Shortcut)
The Windows key + Shift + S combination represents one of the most versatile ways to screenshot in Windows 10 and above. This shortcut activates the Snipping Tool overlay, which provides several capture modes to suit different needs.
Step 1: Make sure the window you want to capture is active (in focus)
When you press this key combination, your screen will dim slightly, and a small toolbar appears at the top of your screen. This toolbar offers four distinct options: rectangular snip, freeform snip, window snip, and full-screen snip.

Step 2: Select your preferred mode by clicking on the corresponding icon,

Step 3 :Then use your mouse to define the area you want to capture.
The rectangular snip allows you to drag a rectangle around any area of your screen, while the freeform snip lets you draw an irregular shape around the content you want to capture. The window snip automatically captures a specific window, similar to Alt + PrtScn, and the full-screen snip captures everything on your display. Once captured, the screenshot is copied to your clipboard and a notification appears, allowing you to click and access basic editing tools before saving.
Method 5: Using the Snipping Tool Application
The Snipping Tool is a dedicated screenshot application that has been part of Windows for many years, offering more control and features than simple keyboard shortcuts. while Windows 11 has replaced it with Snip & Sketch (now called Snipping Tool), Windows 10 users can still access the classic version.
To launch the Snipping Tool,
Step 1: Search for it in the Start menu or press Windows key,
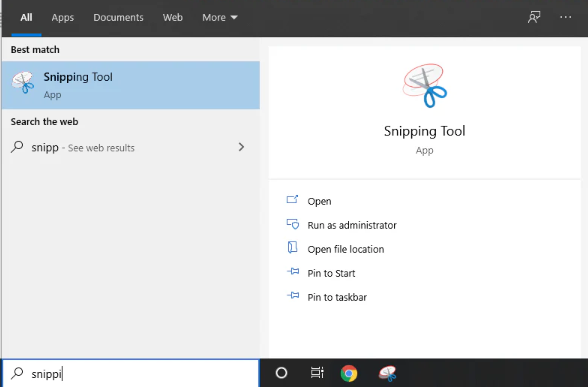
Step 2: Type “Snipping Tool”, and press Enter. Once opened,
Step 3: Click on “New” to start a new capture.

The application offers four modes: Free-form Snip, Rectangular Snip, Window Snip, and Full-screen Snip. Choose your preferred mode from the Mode menu before clicking New.
After capturing your screenshot, the Snipping Tool displays the image in an editor where you can use a pen tool to annotate, a highlighter to emphasise important areas, and an eraser to remove unwanted marks. You can save the screenshot by clicking File > Save As, or copy it to the clipboard for pasting elsewhere. The Snipping Tool also includes a delay feature, which allows you to capture menus and tooltips that normally disappear when you interact with the tool.
Method 6: Xbox Game Bar for Gaming and App Screenshots
Although primarily designed for gamers, the Xbox Game Bar offers excellent screenshot functionality for capturing games and applications in Windows 10 and above. This built-in feature provides a quick way to screenshot in Windows while you’re using various applications.
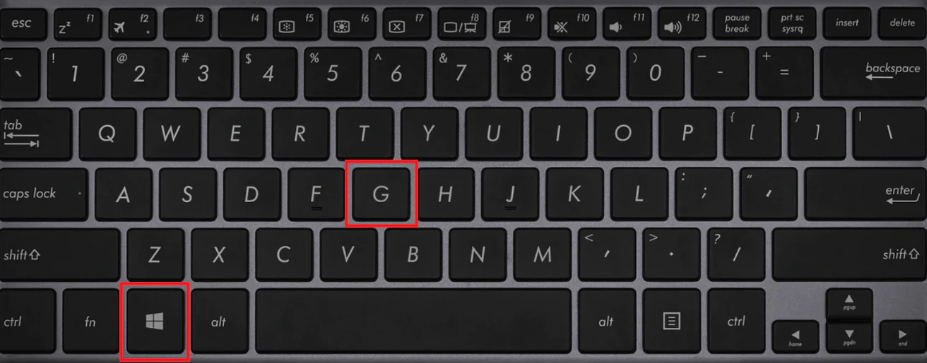
Step 1: Press Windows key + G to open the Xbox Game Bar overlay. If this is your first time using it, you may need to enable it in Settings under Gaming > Xbox Game Bar. Once the overlay appears,
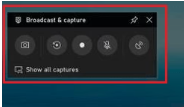
Step 2: Click on the camera icon on the Top Left corner of your screen or press Windows key + Alt + PrtScn to capture a screenshot of the active window or game.
The Xbox Game Bar automatically saves screenshots to the Videos > Captures folder as PNG files. This method is particularly useful for capturing gameplay moments or recording application behaviour. Furthermore, the Game Bar includes additional features like screen recording, performance monitoring, and audio controls, making it a comprehensive tool for content creators and troubleshooters alike.
Method 7: Third-Party Screenshot Tools
While Windows provides numerous built-in options, third-party screenshot tools offer advanced features that power users might appreciate. Applications like Greenshot, Lightshot, Snagit, and ShareX provide enhanced functionality such as scrolling screenshots, automatic uploading to cloud services, advanced editing capabilities, and customisable hotkeys.
These tools are particularly valuable for professionals who regularly create documentation, tutorials, or presentations. Many third-party applications offer features like automatic watermarking, instant sharing to social media, optical character recognition (OCR) for extracting text from images, and batch processing capabilities. However, for most users, the native Windows screenshot methods are sufficient for everyday needs.
Get Your Social Media Shop to Sell Online Without A Website Today
Where Windows Saves Your Screenshots
Understanding where Windows stores your screenshots is crucial for efficient file management. The storage location depends on which method you use. Screenshots taken with Windows key + PrtScn are saved in C:\Users[YourUsername]\Pictures\Screenshots. Xbox Game Bar screenshots are stored in C:\Users[YourUsername]\Videos\Captures.
Conversely, screenshots captured using the basic PrtScn key or Alt + PrtScn combinations are only copied to the clipboard and aren’t saved automatically. You must paste them into an application and manually save them to your desired location. The Snipping Tool allows you to choose where to save your screenshots each time, providing maximum flexibility.
Tips for Better Screenshot Management
Organising your screenshots effectively can save considerable time when you need to locate specific images. Create a dedicated folder structure for different projects or purposes, and rename your screenshots with descriptive names immediately after capturing them. Windows’ default sequential naming system (Screenshot 1, Screenshot 2) isn’t very helpful when you’re searching for a particular image weeks later.
Additionally, consider using keyboard shortcuts consistently to develop muscle memory, which will make taking screenshots feel natural and effortless. For professional documentation, always review your screenshots before sharing them to ensure they don’t contain sensitive information like passwords, email addresses, or confidential data. Cropping unnecessary elements and adding annotations can significantly improve the clarity and professionalism of your screenshots.
Troubleshooting Common Screenshot Issues
Sometimes, the Print Screen key might not work as expected due to keyboard settings or software conflicts. If you’re experiencing issues, first check whether your keyboard requires you to press the Fn key along with PrtScn. Some laptop manufacturers configure the function keys differently, and you might need to press Fn + PrtScn instead.
If the Snipping Tool or screen capture features aren’t working, ensure that Windows is up to date, as system updates often include fixes for such issues. Additionally, check your keyboard settings in the Settings app under Accessibility > Keyboard to ensure the Print Screen shortcut is enabled for opening screen snipping. Some antivirus or security software might interfere with screenshot functionality, so temporarily disabling such programmes can help diagnose the problem and help you efficiently Take a Screenshot in Windows
Frequently Asked Questions
Q: How do I take a screenshot of just one monitor in a multi-monitor setup?
A: Press Alt + PrtScn to capture only the active window on your current monitor, or use Windows + Shift + S to select a specific area across any display.
Q: Can I change where Windows automatically saves my screenshots?
A: Yes, navigate to your Screenshots folder, right-click, select Properties > Location, and choose a new destination folder for automatic screenshot storage.
Q: Why is my Print Screen key not working on my laptop?
A: Many laptops require you to press Fn + PrtScn instead of just PrtScn due to dual-function key configurations in the keyboard layout.
Q: How do I capture a screenshot with a delay in Windows?
A: Open the Snipping Tool application, click on Delay, and select your desired delay time (1-5 seconds) before clicking New to start the capture.
Q: What’s the difference between Snipping Tool and Snip & Sketch?
A: Snip & Sketch is the modernised replacement for Snipping Tool in Windows 10 and 11, offering similar functionality with a more contemporary interface and additional editing features.
Conclusion
Mastering the various ways to Take a screenshot in Windows 10 and above empowers you to capture and share information efficiently, whether for work, education, or personal use. From the simple Print Screen method to the versatile Snipping Tool and Xbox Game Bar, Windows provides comprehensive screenshot solutions for every situation. Experiment with these different methods to discover which ones best suit your workflow, and you’ll soon find yourself taking professional-quality screenshots with ease and confidence.